


How to investigate uneven shoulder wear on an HD919A tire
Uneven shoulder wear on an HD919A tire should trigger a check of inflation, load, wheel alignment, and mechanical condition. The worn edge provides a useful clue, but it does not identify the cause by itself. Before adjusting pressure or ordering an alignment, establish which shoulder is affected, whether the wear continues around the tire, and how its tread depth compares with neighboring tires.
A reliable investigation connects the wear pattern with measured conditions. That distinction matters: correcting today’s pressure will not explain damage caused by an earlier leak, and fitting a replacement tire will not stop wear caused by a loose suspension component.
Decide whether the tire can remain in service
Inspect the shoulder, adjacent sidewall, and tread before carrying out routine troubleshooting. Exposed cords, bulges, separation, deep cuts, or evidence of serious overheating require removal from service and assessment by a qualified tire technician. A tire with suspected structural damage should not be road-tested to see whether the problem continues.
Check the most worn area against the applicable removal criteria for the vehicle and operation. Adequate tread in the center does not compensate for a shoulder that has reached its service limit. If the tire has operated severely underinflated, restoring pressure alone does not establish that its casing is sound.
Record the HD919A wear pattern before changing anything
Identify the tire’s size, service description, axle position, mileage or operating hours, and installation history. Record “vehicle-side shoulder” or “outside-facing shoulder” rather than simply “left” or “right.” Those descriptions remain clear when reviewing photographs or comparing opposite sides of the vehicle.
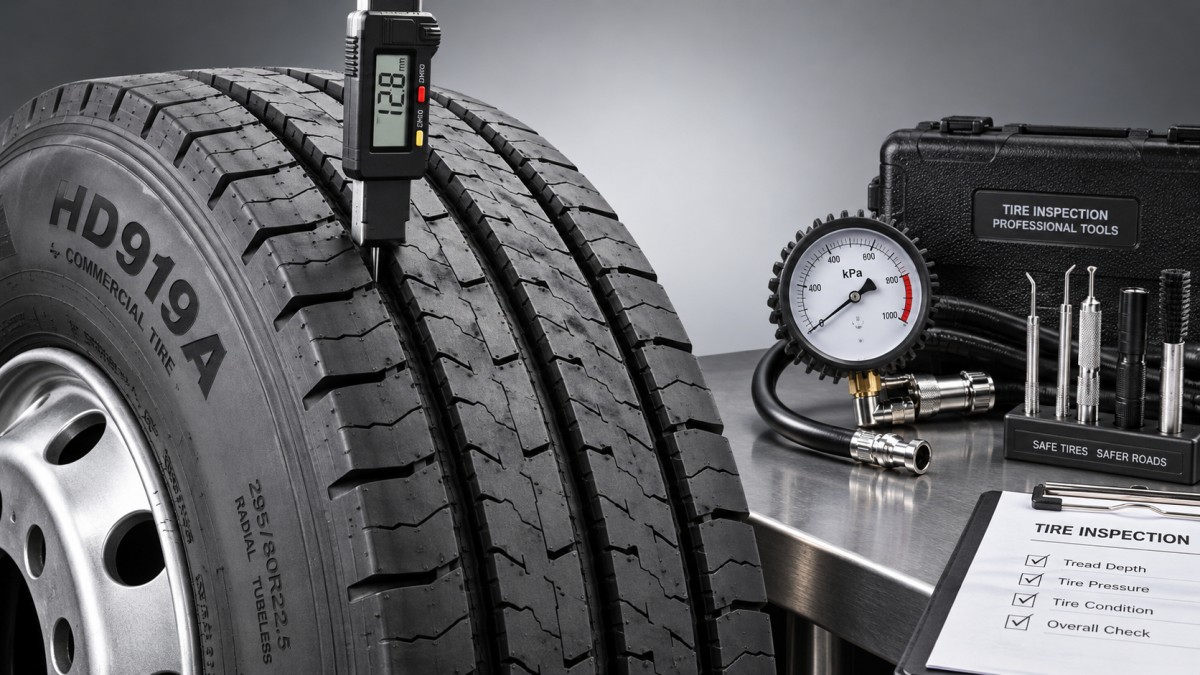
Photograph the complete tread and the affected edge. Measure tread depth in comparable main grooves near both shoulders and through the center, repeating the measurements at several points around the circumference. Avoid wear indicators and shallow decorative features, which can distort the comparison.
Some tread patterns have shoulder features that are naturally shallower than the main grooves. Compare equivalent measurement locations and, where available, the original tread profile. A single shoulder-to-center difference is less informative than a consistent pattern of material loss.
Use the inspection record to distinguish these conditions:
- Both shoulders worn more than the center: investigate insufficient inflation for the carried load, overloading, and operating conditions that heavily work the shoulders.
- One shoulder worn smoothly around the circumference: investigate wheel geometry, axle alignment, and repeated lateral loading.
- Feathered tread edges: investigate lateral scrub, including toe or axle alignment problems. Tread edges may feel smoother in one direction than the other.
- Scalloped or patchy shoulder wear: investigate looseness, damping problems, runout, and imbalance rather than treating the condition as uniform edge wear.
These patterns guide the next inspection; they are not proof of a particular fault. Compare the opposite wheel and other tires on the same axle. Similar wear across several positions suggests a shared operating or maintenance issue, while one affected position deserves closer local inspection.
Check cold pressure against the actual load
Measure inflation with a reliable gauge when the tires are cold, before operation has raised their temperature. Record each reading before adjustment. Do not bleed a hot tire down to a cold-pressure target: pressure normally rises during use, and bleeding it can leave the tire underinflated when it cools.
Select the operating pressure from the applicable load–inflation guidance for the exact tire size, service description, and single or dual fitment, together with the vehicle requirements. A sidewall pressure marking is not automatically the correct setting for every load. Pressure requirements from another tire model or size should not be transferred to the HD919A.
Check how the vehicle is actually loaded. An acceptable total vehicle weight can still conceal an overloaded axle or uneven side-to-side distribution. Axle weights, and individual wheel-position weights where available, provide stronger evidence than an estimated payload. Increasing pressure cannot make a load beyond the tire or wheel’s capacity acceptable.
If pressure is low, investigate the valve, valve extension, bead seating, rim condition, and possible punctures. Review previous pressure records as well. A normal reading after a recent top-up does not rule out prolonged underinflation earlier in service.
On dual assemblies, check both tires separately. Unequal pressure or mismatched rolling circumference can produce unequal load sharing. Inspect clearance and look for contact marks between the tires; the outward-facing tire alone may not reveal the assembly’s problem.
Inspect mechanical condition before adjusting alignment
One-sided wear often prompts an immediate alignment request. Start by checking the components that hold the wheel in position. Excessive wheel-bearing play, worn steering joints, loose suspension bushes, damaged springs, and insecure axle mountings can allow wheel geometry to change under load.
Inspect these components using the vehicle manufacturer’s procedures and safe lifting arrangements. Correct looseness or damage before making alignment adjustments. Otherwise, an apparently satisfactory reading may change as soon as the vehicle brakes, turns, or carries a load.
The relevant checks depend on axle design and wheel position. On a steer axle, toe and camber can contribute to shoulder wear. On drive or trailer axles, axle tracking, thrust angle, and suspension positioning may be more relevant. A displaced axle can make tires scrub sideways even when the steering-wheel position seems normal.
Consider the geometry and tread texture together. Excessive toe can create feathering as the tread scrubs across the road. Camber can shift contact loading toward one shoulder. Neither explanation should be accepted without measurements, particularly where a rigid axle offers limited adjustment.
If wear varies around the circumference, inspect wheel and tire runout, mounting accuracy, balance, and suspension damping. Look for a bent rim, incorrect seating, or localized damage. These faults can create changing contact loads that a basic alignment adjustment will not resolve.
Match the findings to the vehicle’s working conditions
Ask when the wear began and what changed beforehand. Useful clues include a new route, increased payload, frequent tight turns, curb contact, suspension repairs, or a previous tire rotation. Rotation history matters because the current wheel position may not be where the wear developed.
Repeated low-speed turning can scrub shoulders, especially where axles follow different paths through a turn. Road camber and repeated cornering can also influence wear distribution. These explanations become more persuasive when pressure, loading, and mechanical measurements are satisfactory and comparable vehicles show similar patterns.
Check fitment as part of this review: approved rim width, tire capacity, axle suitability, and mounting direction where specified. A tire selected mainly because its dimensions fit may still be unsuitable for the axle duty or service conditions.
Choose corrective action and verify that wear slows
Link each action to a finding. Repair a leak and restore load-appropriate inflation; correct excessive loading or distribution; replace worn components before alignment; or address mounting and runout faults where wear is localized. Avoid rotating the tire simply to hide the affected shoulder. Rotation may be useful where permitted, but it cannot repair existing wear or remove its cause.
If replacement is necessary, assess suitability from the complete specification. For example, M626 is listed for industrial and commercial applications in sizes including 6.50-15-12PR and 7.00-16-12PR. Those listings provide a starting point for selection; they do not establish interchangeability with the tire being investigated. Rim compatibility, load capacity, speed capability, and axle application must match the vehicle’s requirements.
Keep the original tread measurements as a baseline and arrange a follow-up inspection suited to the severity of the wear and the vehicle’s duty. Measure the same locations, under comparable conditions, and record distance or operating hours. The existing shoulder wear will remain visible; the useful evidence is whether additional uneven wear has slowed.
When the cause remains unresolved, retain the tire identification, photographs, pressure and load records, alignment results, and repair history for a supplier assessment. A documented pattern supported by measurements gives a far clearer basis for deciding the next action than a photograph of the worn shoulder alone.
Chat Online